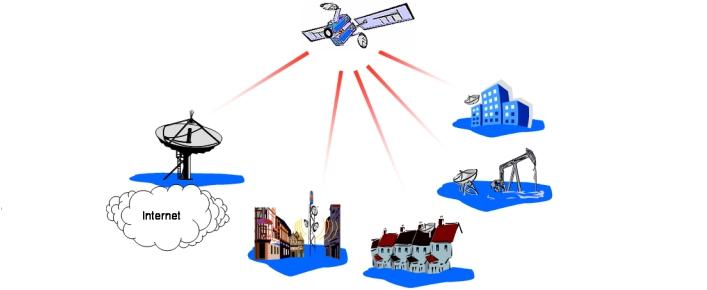
Setting up satellite Internet Connection
Now, a simple user can himself install home satellite internet without having to call a specialist entirely.
Before installing a satellite Internet, you need to think whether you really need it or don’t need it. As with any type of communication, the internet via a satellite dish, there are advantages and disadvantages. Plus you can find that the connection is fully carried out “through the air.” That is, if used as the outgoing link mobile phone, the wires do not. As the outgoing link can be available anywhere. Also among the advantages, it is worth noting the high rate of acceptance – it can be up to 2 Mbps when using the standard DVB-S and even higher when using the DVB-S2. In moments of uphill traffic costs are significantly reduced. NL paying on your plate, you still have to pay for outgoing traffic. Especially, the price of unlimited internet for a month via satellite is significantly higher than the NL for uplink channel. Since both inbound and outbound traffic travel through very different means of communication, the Internet at work is a delay signal, which is quite high. This may prevent gamers, because in many games (especially online) ping time (the response from the dedicated servers hosting) is critical.
But if you do decide to install a satellite Internet, you need to buy the equipment.
To operate a satellite internet you need:
1. Satellite dish: It is desirable to offset. It easier to configure, since the focus is shifted;
2. Head-unit: It is fastened to the bracket plate. It is he who receives the signal;
3. Coaxial cable: Select the desired length, but so that it does not bend or pinch. To avoid interference in your work. And the cable must be with the screen – aluminum foil for insulation;
4. DVB-card: This is the core of our installation. You can choose what you want, but if you want to tune in with help, then you should choose TechnoTrend TT-1401. The choice is not the best, as the card format is DVB-S, and already there are more high cards DVB-S2. But nonetheless, it can be used for the Internet;
5. Naturally, the computer in order to make it all pull together and function normally;
6. Outbound channel: Will fit all;
Let’s start.
Collecting plate , probably should not be a problem. The main emphasis in collection is put on your strength and agility. The main point we can say that to fix a plate fasteners are not necessary, as will still focus on the satellite dish, and only the extra traffic will have to do with relaxing the nuts. Also, when mounting the dish coaxial cable to connect with the earth, and always at the head, the receiver will be in the house. It needs to be firmly set in place of coax mount to the Internet where you will not need to be afraid of thunder, lightning or other natural disasters.
Establish the DVB-card to your computer. To do this, remove the cover of your computer and put the card into a free PCI-slot on the motherboard. Closing the housing system unit, connect the coaxial cable coming from the dish, with the board. The compound is produced by the same principle as in the head-unit.
NOTE: When installing, the expansion card must be completely power off and as well as the system unit! If you have the power supply switch button, click it. If not – just pull the system from the network.
Install the software – the driver and a program receiving data. DVB-C card is supplied driver disk. Establish the first driver from there (for Windows XP it will be in a folder 219, for Windows Vista or Windows Seven it is located in the BDA). After this you should put the program to receive data. Go to the folder from which you installed the driver. There will be a Software folder – we go into it, then go to the OEM, and then to the PCI and start the installer Setup from there. After installation, run DVB-Data software – in the system tray (near the clock) red sad smiley will appear. Click on it twice – setup window will appear. At the top of the window, click “New” in the “Name of data service” write “SatGate”, in the “Take Settings From” select “Casablanca & Streams”. Click “Apply”. Then click the “Filters” in the box where it says “Use MAC Address of the DVB-card” rewrite or copy the address of your DVB-card.
Now we need to get an account to use the Internet. I assume that the modem you have, is running. From here, you’ll need to get online and get the original data to adjust. As a provider, you can choose any, settings, not much will change. For example, we choose SatGate as the operator. To obtain an account you can go two ways – either directly or through a service provider. You will need to pay for creating an account. To create an account through SatGate click on the link . There we have to fill out a questionnaire. Must fill out the fields “Username” and “E-Mail”. By e-mail, the instructions for setting up and your options will be sent. Press the Create button after completing.
After clicking on the button “Write” will appear the following form, which must be filled. MAC-address – write one that was released from the DVB-Data box. Connection Type: dynamic / slonax. OS – choose the one that you should do. Dish size – 90. Click GO. In the next window you must choose a card type that you have worth.
TechnoTrend – clone card SkyStar 2. So choose it up. Again, click GO. After that, you will receive an e-mail that has received a file with information about the configuration of your Internet.
To update your account we need to translate to any of the purses SatGate desired amount. For each type of exchange is your wallet. Just send the required amount at the purse, said in the commentary to the translation of your username, obtained during registration.
Now we need to focus on the satellite dish . For this we define the satellite. Site SatGate can choose whichever satellite. Tariffs on them all about the same, so we agree on setting up the satellite Astra-2C. Its parameters:
1. Frequency: 11797500 kilohertz;
2. Symbol Rate: 27 500 kS / s;
3. Polarization: H (horizontal);
But before you start setting up the dish, we make some more settings by clicking on the tab “Setup”. Everywhere we put a tick, but “Notify on program closing”, then click the button “LNB / Satellite Settings”, where we choose “DiSEqC – none”, and in the adjacent drop-down list select any satellite. Click “OK”, then “Apply”. Go back to the “Status / Tuner” tab, and thither to contribute data in the satellite above.
To adjust the part, you will need a Fast SatFinder program. To adjust it is a little confusing, more preferably adjusted using DVB-Data, but in the above mentioned program has a very important function – you can customize the dish to the satellite, knowing the approximate position of the plate. To do this, you just have to indicate on what satellite dish and have to adjust your location. So, start the program, look for the satellite. Then left click the button “Dish Alignment”, at the top of the window that appears, specify its location in degrees of latitude and longitude. Then you can click the “Export”, and the picture with the settings will be saved. Armed with a compass, you can go to customize a plate. Setting plate depends on its position around the axis of its tilt and rotate the head of the receiver-converter. Upon completion of setting smile,y DVB-Data should be green and contented, the quality of the signal must be unequivocally 100%, and the level of 60% to ensure uninterrupted signal.
Thus, the plate we set up, let us enter the account on the website, enter username and password received upon registration. There, check that it is correctly identified in the satellite, which we set up the dish or not. Then choose a calling plan. To start, you can use any type of tariff “Prepaid or Postpaid”. Choosing, for example, the rate at speeds of 128 kilobits per second. In brackets the PID. Save the changes and open DVB-Data. Here on the Filters tab add as PID-a one that is registered in the personal office of your account. Click the button “Apply”. All tuning plate is now over.
To work, plates need a “SlonAx 3G” program, traffic accelerator and optimizer. Download the latest version. After downloading, install it. Installation is intuitive, so you need to click a few buttons to install. When you first start, you will be prompted for your username and password. Everything else to initiate change is not worth it. Then click “OK” opens a new window. To connect make sure that outbound channel was launched, otherwise the program will not be able to connect. After pressing the “Connect”, program will connect, and you can safely run a browser, messenger, mail client, and surf the Internet.
- Achieving Secure, Reliable Compliance with India’s Data Sovereignty Mandates - November 17, 2025
- Implementing GPU workloads in critical government application - November 12, 2025
- Why the BFSI Industry Needs GPUaaS Now - October 31, 2025