Nagios For Server Monitoring
 Why?
Why?
Nagios is designed to monitor servers and services.
Under this service, you can understand a lot of things, such as http, ie, Web server running on some host.
The program is for everyone who is having a website and who wants to know, whether it is in working in good condition or not.
In this article I’ll show you the basic foundation for better understanding
Installation
First of all, you should set up apache / php web server .
Once the server is installed, put nagios:
Or via the console:
sudo apt-get install nagios3
During installation, you will be asked questions about the mail. Leave it to your discretion.
Start, stop nagios can be in the same way as the other modules:
sudo / etc/init.d/nagios3 start
sudo / etc/init.d/nagios3 stop
Let’s create a password for default user nagiosadmin:
sudo htpasswd-c / etc/nagios3/htpasswd.users nagiosadmin
Now open a browser and type in the address bar:
http://localhost/nagios3/
Instead of localhost substitute the desired value, if you install nagios on remote server.
Enter your username and password nagiosadmin specified above.
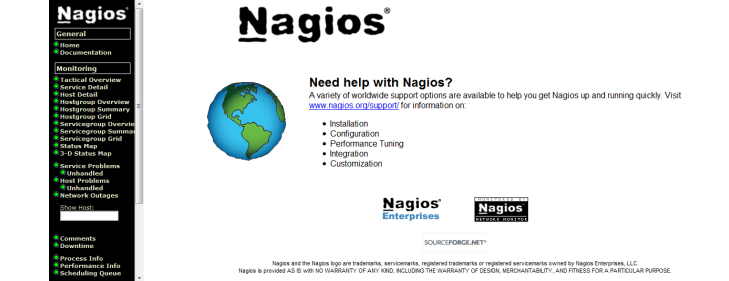
You should see the following picture:

On the left you will see a menu where you can select the desired item, and right – the actual result.
Choosing the left “Host Detail”.

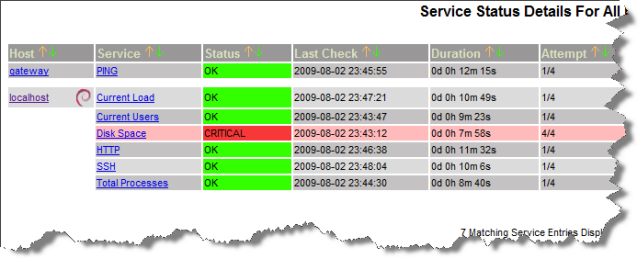
You will see a list of hosts and their status. In my case, two of them: the machine is running on nagios, and a router.
Next, open the “Service Detail”.

On each host, it has its own set of “services”, which checks the nagios.
You will set default set’s of services for the local machine and installed nagios.
If you have a problem with Disk Space, as in my screenshot, I show below how to fix it.
Customize
As an example, I add the configuration for the site www.website.com.
I need to add a host and a couple of services.
Where are the main configuration files located?
In the directory / etc/apache2/conf.d / nagios3.conf file is located, from which it takes the Apache configuration for nagios.
nagios files are located in the directory / etc/nagios3.
File / etc/nagios3/htpasswd.users contains passwords for the nagios user. Command to create the file and set the password for default user nagios is quoted above. In the future, you will need to omit the argument “-c” if you set a password for the user, otherwise a new file will overwrite the old one.
File / etc/nagios3/nagios.cfg contains the basic configuration of the nagios. For example, logs, or the path to the other configuration files that nagios reads at startup.
The most interesting is in the directory / etc / nagios / conf.d.
Go to the directory and view the contents of files to keep in mind a rough picture of what is happening. Hosts are specified through a directive define host, through the services directive to define service. There is a group of hosts, which we will now use.
Create a new file:
sudo gedit / etc/nagios3/conf.d/host-website.cfg
Rather than host-website.cfg write the name of your host that you want.
You can copy the definition of a host of file localhost_nagios2.cfg. Here’s what happened with me:
define host {
host_name website
alias website
address website.com
use generic-host
}
In the address write address of the host. It could be either the site address or ip-address.
In the host_name write identifier, which will use more.
In the following alias write anything.
At the moment, leave the field to use generic-host, and in the future you decide what to write there, after further reading the documentation.
Save the file and restart nagios.
Go to the “Host Details” page:

If you did everything correctly, you should see your new host in this list. Do not worry if the status is “Pending” – this means that nagios did not check out the new host yet.
The system does not check the nagios regularly but after a specifictime interval. After a while you’ll see results.
Now, to add services, we add our host in a group.
sudo gedit / etc/nagios3/conf.d/hostgroups_nagios2.cfg
You will see a list of host group.
All you need do is add your new hosts to a specific group.
In my case I added the host in three groups: debian-servers, http-servers and ping-servers
# A list of your Debian GNU / Linux servers
define hostgroup {
hostgroup_name debian-servers
alias Debian GNU / Linux Servers
Members localhost, website
}
# A list of your web servers
define hostgroup {
hostgroup_name http-servers
alias HTTP servers
Members localhost, website
}
# Nagios doesn’t like monitoring hosts without services, so this is
# A group for devices that have no other “services” monitorable
# (Like routers w / out snmp for example)
define hostgroup {
hostgroup_name ping-servers
alias Pingable servers
Members Gateway, website
}
Says the commentary to ping-servers, nagios does not like to monitor the dedicated hosting server without service, so a group of ping-servers can be used for all hosts that have no service. All that will nagios do is ping the server. I added it here just for illustration.
Group services http-servers is designed to check the availability of http.
A group of debian-servers are also taken as an example that you see below.
So restart nagios and open “Service Details”.
If you did everything correctly, you should see your new projects. In my case it’s http and ping. You may ask why it was adding a host to a group of debian-servers? Notice the icon next to the host. This is what is governed by this group. Setting up a group is in the file / etc/nagios3/conf.d/extinfo_nagios2.cfg.
That’s it. This concludes an overview of the nagios test. I hope that this article will help you to explore this beautiful tool and customize it to suit your needs. Also, nagios can even measure the CPU temperature and speed of cooler.
And finally, fix the problem with the disk space in Ubuntu:
sudo gedit / etc / nagios-plugins / config / disk.cfg
You need to add that is highlighted in bold:
# ‘Check_disk’ command definition
define command {
command_name check_disk
command_line / usr / lib / nagios / plugins / check_disk-w ‘$ ARG1 $’-C ‘$ ARG2 $’-p ‘$ arg3 $’ -A-I ‘. gvfs‘
}
# ‘Check_all_disks’ command definition
define command {
command_name check_all_disks
command_line / usr / lib / nagios / plugins / check_disk-w ‘$ ARG1 $’-C ‘$ ARG2 $’ -A-I ‘. gvfs’
}
| http://ubuntologia.ru/nagios |
- How Cloud Computing Is Changing The Labor Market - March 25, 2015
- Adopting Infrastructure as a Service Can be a Good Deal - March 17, 2015
- Will Virtualize? Take These Six Points Into Consideration - March 12, 2015
I have installed nagios on one of server but I am unable to add the hosts.I have added it under /usr/local/nagios/etc/objects
They are all showing the information of server where I have installed nagios. I am using Centos.
Can you please let me know the exact steps?